Overview
Introduction
Overview
Introduction
Atoa lets UK businesses receive instant payments directly into their bank accounts. Customers scan a QR code or tap a payment link to make payments using their bank app, providing a secure and efficient way to manage transactions. Atoa is compatible with all major UK bank apps.
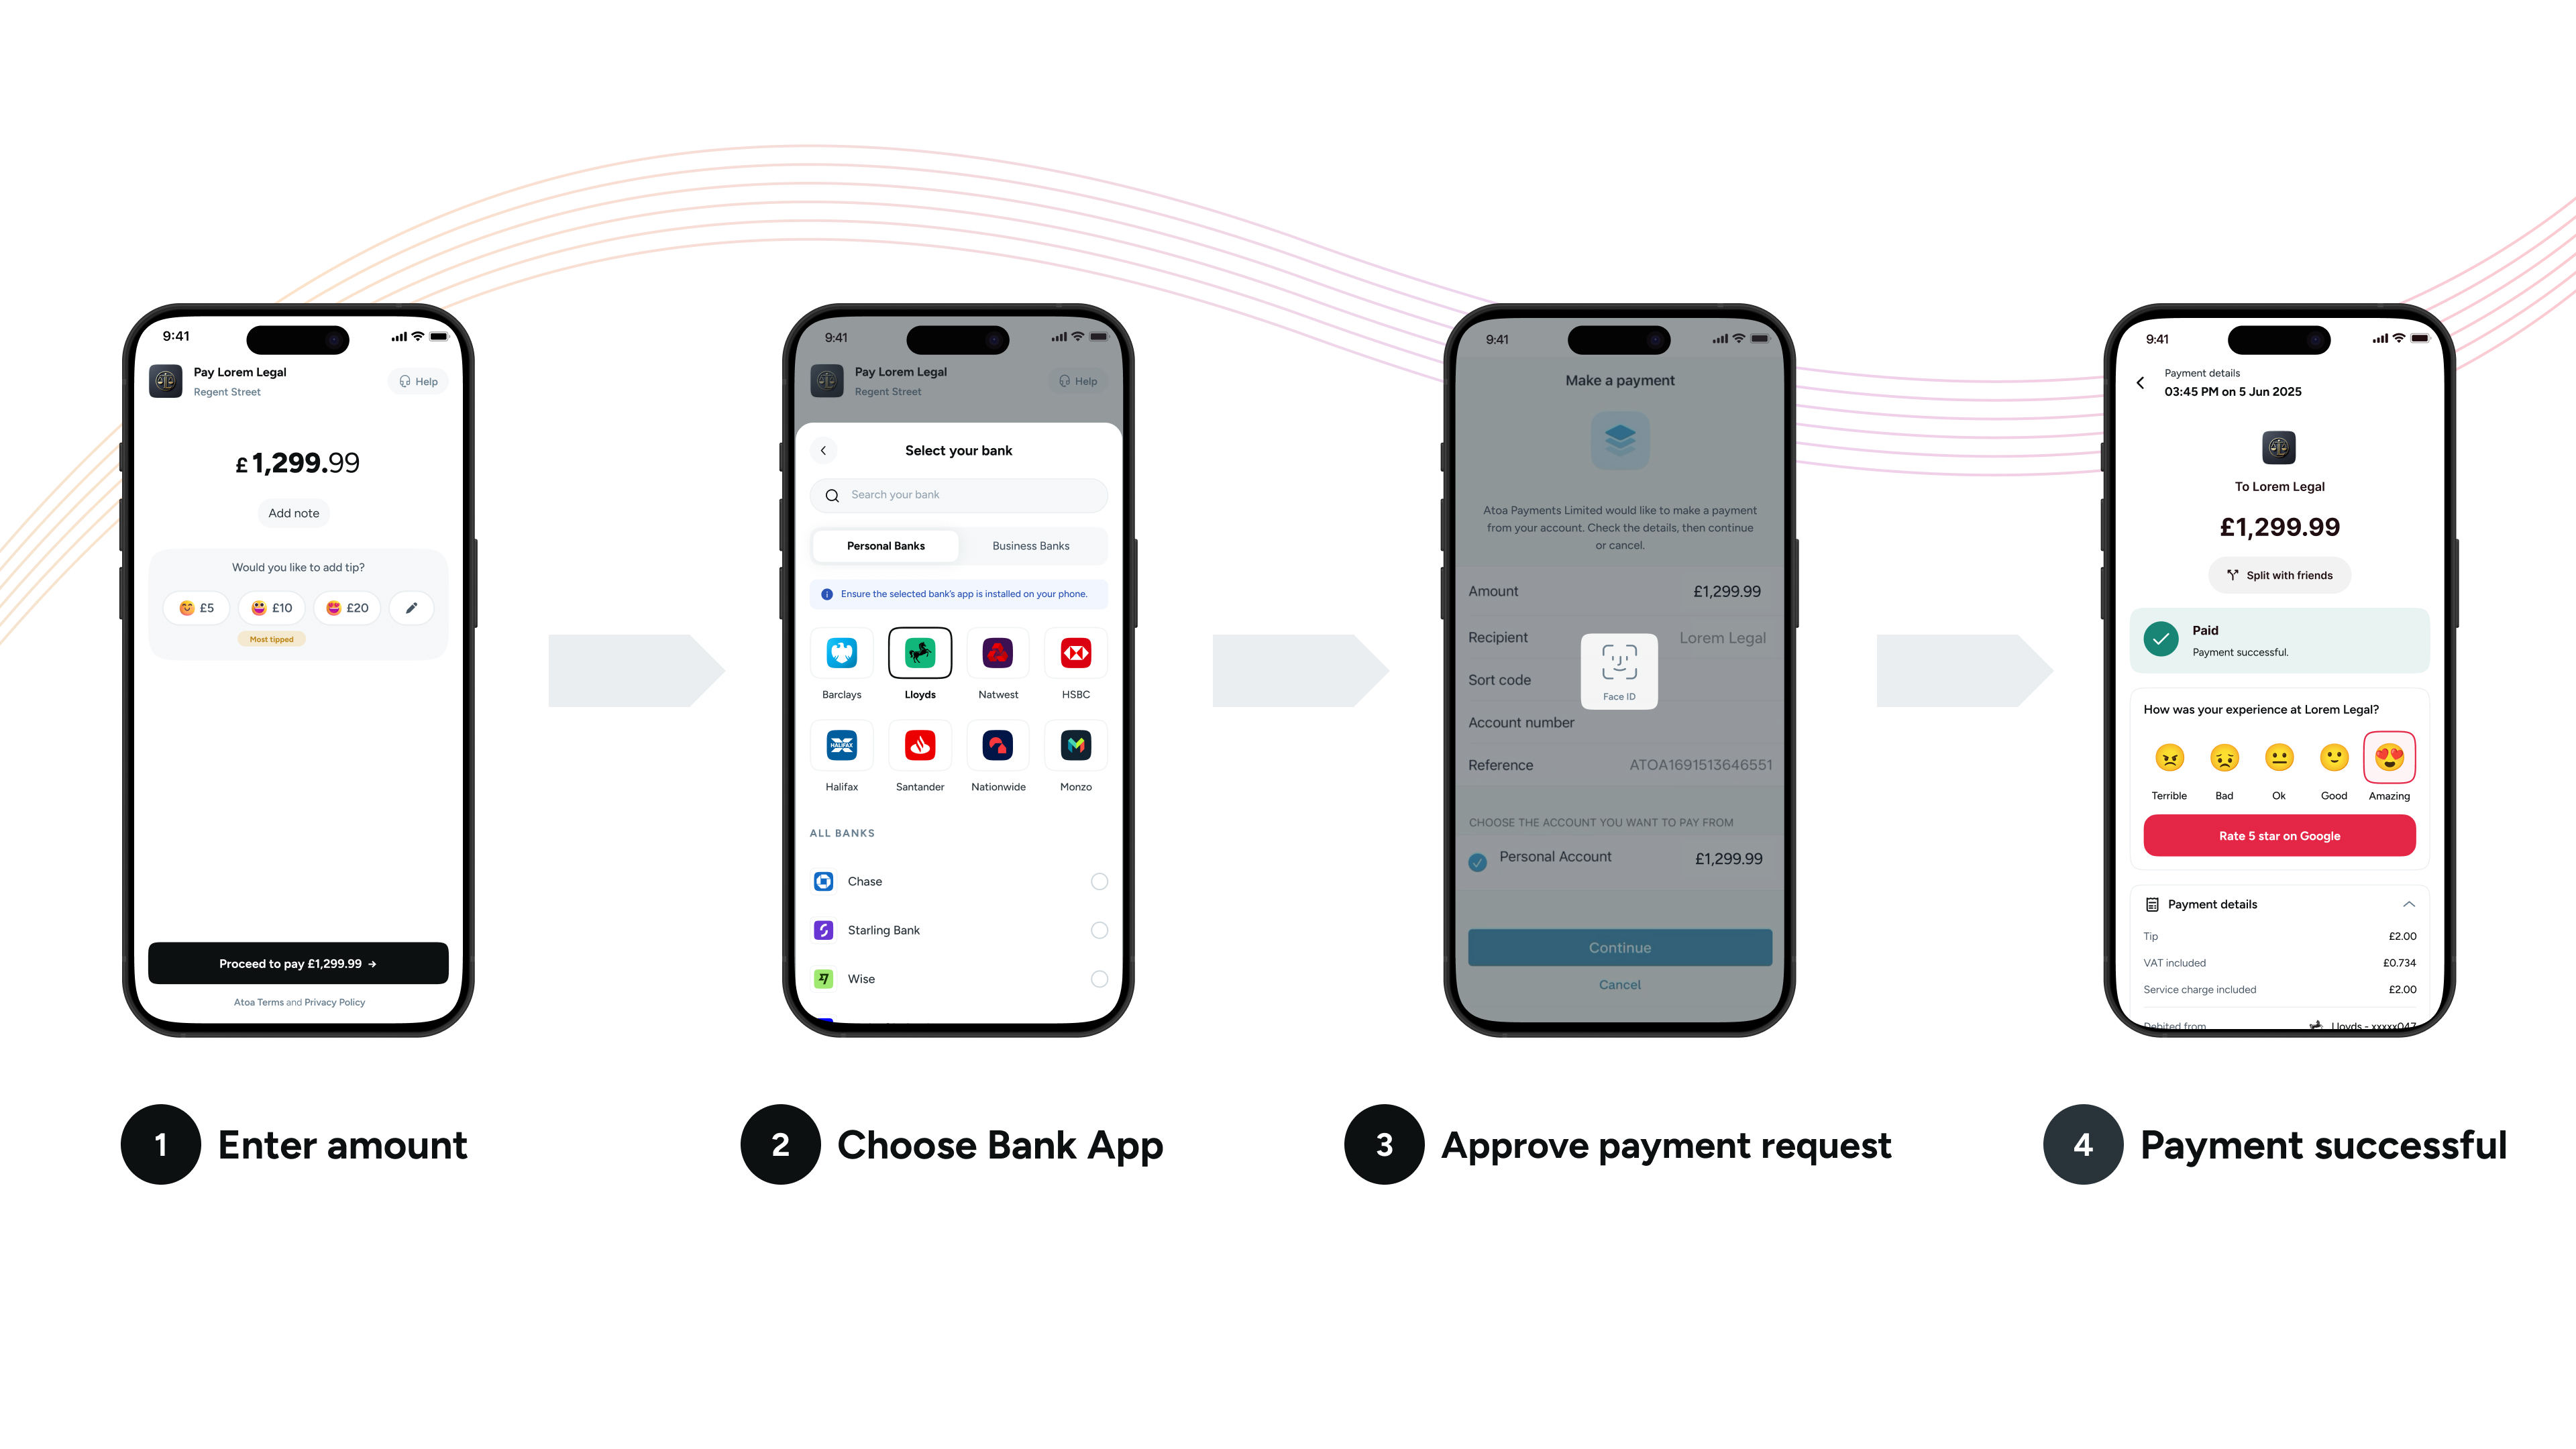
Getting started
A brief guide on how to use Atoa for payments.
Pos integration
How to integrate Atoa with your point-of-sale system.
Api Reference
Explore the full suite of API endpoints available.
Atoa CLI
Manage payments, customers, and webhooks from your terminal.
MCP Server
Connect AI assistants to Atoa using the Model Context Protocol.